

Building a new home or tackling a major renovation involves far more than picking paint colors and cabinet hardware. Long before any delivery truck drops off lumber or appliances, a lineup of specialized professionals needs to assess, plan, and prep your site. Skipping or misordering these steps is one of the most common reasons projects stall or blow past budget.
This guide walks through the trades you’ll likely need to coordinate before construction materials ever arrive, so you can plan your timeline with confidence.
Clearing and Shaping the Building Site
Before anything else happens, your land has to be evaluated and prepped for construction. This often means grading, removing debris, and addressing drainage issues that could otherwise cause foundation problems down the road. Getting this stage right sets the tone for every trade that follows, since a poorly prepped site can derail schedules and inflate costs later.
Many homeowners underestimate how much heavy equipment work is involved in even a modest project. Hiring one of the local excavating companies early in the process helps you avoid surprises like hidden rock formations, poor soil composition, or unexpected water tables. These professionals can also advise on septic placement, utility trenching, and driveway grading before foundation work begins.
- Site evaluation for slope, drainage, and soil stability
- Tree and stump removal where needed
- Rough grading to establish building pad elevation
- Trenching for utility lines
- Erosion control measures during construction
Renting Heavy Equipment for Smaller Projects
Not every project justifies bringing in a full excavation crew, especially for smaller additions, landscaping overhauls, or detached structures. In these cases, arranging an excavator rental can be a cost-effective way to handle digging, trenching, or demolition work yourself or with a small crew. This option works best for homeowners who already have some experience operating machinery or who are willing to hire an operator by the day.
Before going this route, it’s worth checking local permitting rules, since many municipalities require inspections even for owner-managed earthwork. You’ll also want to confirm what attachments come with the rental, as buckets, augers, and grading blades each serve different purposes. Renting equipment can save money, but only if you’ve accurately scoped the work beforehand.
- Confirm machine size matches your project scope
- Ask about operator training or rental orientation
- Check for delivery and pickup fees
- Verify insurance coverage during the rental period
Laying the Structural Foundation and Framework

Once the ground is ready, structural work begins, and this is where many homeowners first encounter terminology they’ve never needed before. Bar joists, for example, are steel trusses often used in garages, workshops, or additions that need to span wider distances without interior support columns. They’re lighter than solid beams but still strong enough to carry roofing loads, which makes them popular in both residential and light commercial construction. Framing crews typically install bar joists at regular intervals—commonly 2 to 4 feet apart, depending on the load requirements and the roofing material above them. Spacing them correctly matters because too wide a gap can cause sagging over time, while unnecessarily tight spacing drives up material costs without adding real benefit.
A structural engineer usually calculates the exact spacing based on snow loads, roof pitch, and the span distance involved. Beyond bar joists, this phase also involves wall framing, header installation above doors and windows, and sometimes engineered lumber like LVL (laminated veneer lumber) beams for longer spans in wood-framed sections. Each of these elements has its own lead time and inspection requirement, so scheduling delays in one area can quietly push back everything downstream. Homeowners should also budget for a structural inspection before drywall goes up, since fixing framing issues after the fact is far more expensive than catching them early.
Before the framing crew ever shows up, structural engineers and designers are making decisions that dictate everything else about how your trades sequence through the project. Beam sizing, header placement, foundation type, and load-bearing wall locations all get locked in here, and reversing any of them later means tearing into finished work. This is also where soil reports, snow load requirements, and local wind zone ratings get factored into the plan, so what works for a house two states away may not pencil out on your lot. Understanding this stage matters even if you’re not the one doing the engineering.
Knowing why a contractor recommends an LVL beam over standard dimensional lumber, or why a particular wall can’t move, helps you ask better questions and avoid costly change orders later. It also gives you a realistic sense of lead times — engineered beams and trusses are often special-order items that can take two to six weeks to arrive, which affects your whole schedule. If your project includes any long-span rooms, vaulted ceilings, detached garages, or workshops, expect this conversation to come up early in the design phase. Wide-open spaces without interior support walls typically require steel beams, engineered wood products, or additional footings, all of which need to be specified before a permit is even submitted.
Flagging these rooms early lets your contractor price the structural work accurately instead of discovering the need mid-build, when changes cost significantly more in both time and money.
- Confirm load calculations with a structural engineer, including point loads from upper-floor additions, wide-span openings, or rooftop equipment like HVAC units
- Ask whether steel or wood framing suits your design, weighing cost, span capability, fire rating, and local seismic or wind code requirements
- Factor in lead times for custom structural components — engineered beams and steel can take 4-12 weeks depending on shop backlog
- Coordinate framing schedules with your general contractor to align subcontractor availability with material delivery windows
- Verify foundation and footing specs match the finalized framing plan before any concrete is poured
- Schedule required inspections at each framing milestone so work isn’t covered before sign-off
Coordinating the Roof Before Final Framing
Roofing work often gets scheduled earlier than people expect, since the structure needs to be weather-tight before interior trades can move in. Getting quotes from a few roofing companies during the design phase helps you compare material options, from asphalt shingles to metal panels, and understand how each choice affects your timeline and budget. Weather delays are common here, so building in buffer time is smart planning.
It’s also worth discussing ventilation, insulation compatibility, and warranty terms before signing a contract. A roof that looks great but traps moisture can cause problems for years, so these conversations matter more than they might seem at first glance.
- Compare material lifespans and maintenance needs
- Ask about warranty coverage for labor and materials
- Discuss ventilation and insulation integration
- Confirm cleanup and disposal of old roofing materials
Hiring Help for Roof Repairs and Inspections

Separate from new installation, many projects involve assessing an existing roof before other work can proceed, especially additions that tie into an existing structure. Experienced roofers can identify soft spots, flashing issues, or aging materials that need attention before new construction connects to the old roofline. Catching these problems early prevents leaks that could damage freshly finished interior work.
This inspection step is easy to overlook when you’re focused on the exciting parts of a renovation, but it protects your investment in everything built afterward. A thorough roof assessment typically takes just a few hours but can save thousands in repair costs down the line.
- Request a written inspection report with photos
- Ask about flashing condition around chimneys and vents
- Confirm how tie-in points will be sealed
- Get a timeline estimate before other trades start
Planning Climate Control Before Walls Close Up
Heating and cooling systems need to be mapped out well before drywall goes up, since ductwork and refrigerant lines run through walls and ceilings. Scheduling AC installation during the rough-in phase ensures your contractor can route lines efficiently without having to cut into finished surfaces later. This is also the right time to discuss zoning, unit sizing, and energy efficiency ratings.
Homeowners sometimes assume HVAC decisions can wait until the end, but that approach often leads to compromises in system performance or unsightly exposed ductwork. Getting this trade involved early gives you more flexibility in equipment placement and keeps the rest of your timeline on track.
- Confirm unit sizing based on square footage and insulation
- Ask about zoning options for multi-level homes
- Discuss placement of outdoor condenser units
- Review energy efficiency ratings and rebate eligibility
Scheduling Gas and Utility Rough-In Work
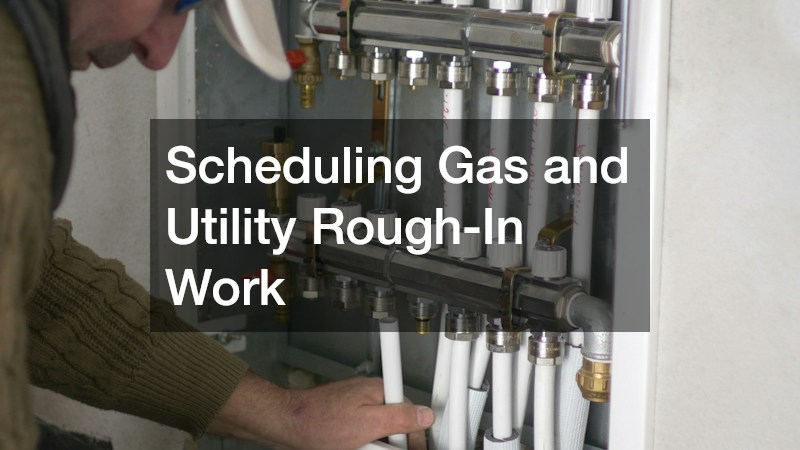
If your project includes a gas range, fireplace, or outdoor kitchen, gas line installation needs to happen during the rough-in stage alongside plumbing and electrical work. This is specialized work that requires proper permitting and pressure testing to meet safety codes, so it’s not a trade to schedule as an afterthought. Coordinating this early also prevents conflicts with other utilities running through the same wall cavities or trenches.
Many homeowners are surprised by how much planning goes into appliance placement because of this requirement. Deciding on your kitchen layout or outdoor living space early gives your utility trades accurate information to work from, reducing the chance of expensive relocations later.
- Confirm permit requirements for new gas lines
- Schedule pressure testing before walls are closed
- Plan appliance locations before rough-in begins
- Ask about shut-off valve placement for safety
Designing Outdoor Living Spaces Alongside the Build
Outdoor spaces often get planned last, but integrating them into your overall project timeline saves money and avoids redoing finished landscaping. If you’re envisioning a patio, pergola, or multi-level deck, bringing in custom deck builders during the design phase lets them coordinate footings and structural supports with your home’s foundation work. This is especially important if the deck will share a wall, roofline, or drainage path with the main structure.
Shade and comfort features deserve attention at this stage too, since retrofitting them later is often more expensive. Adding outdoor solar shades to a covered patio or deck can reduce glare and heat significantly, and planning their mounting points during construction is far simpler than attaching them to finished surfaces afterward. Discussing these details early keeps your outdoor space functional through more of the year.
- Coordinate deck footings with foundation and drainage plans
- Discuss railing and stair code requirements early
- Plan electrical runs for outdoor lighting or fans
- Consider shade structures before finalizing patio layout
Vetting and Scheduling Your Trade Partners

With so many specialists involved, from grading crews to roofing contractors, organizing your trade schedule is arguably the most important part of pre-construction planning. Each trade should be vetted before a contract is signed, not after a problem surfaces mid-project. That means collecting at least three bids per trade category, checking references from jobs completed within the last year, and confirming current licensing and insurance certificates directly with the issuing agency rather than taking a contractor’s word for it. Pay close attention to liability coverage and workers’ compensation limits, since a gap here can leave you financially exposed if an accident happens on-site.
It’s also worth asking each trade partner about their typical lead time and crew availability, since roofing contractors and electricians in particular can book out six to eight weeks during peak building season. Building that buffer into your schedule now prevents a scramble later. A general contractor can manage this vetting and scheduling process for you, coordinating bids, insurance verification, and sequencing across every trade. But even when you hand off that responsibility, understanding the build sequence yourself helps you ask informed questions, spot scheduling conflicts early, and recognize when a trade’s timeline doesn’t align with the work that needs to happen before or after it.
Communication between trades matters just as much as the individual expertise each one brings. Problems often arise not because a single trade did poor work, but because scheduling gaps or miscommunication caused rework — the electrician roughs in before the HVAC ducting is finalized, or the drywall crew shows up before plumbing inspection is signed off. These collisions cost real money, often adding days or even weeks to a timeline that looked tight but workable on paper.
Before work begins, ask each trade partner for a realistic window of time they need on-site, plus any dependencies they have on other trades finishing first. A framer who needs three days might actually need five if weather delays or material shortages are likely, so build in a buffer of 10-15% on top of every trade’s quoted timeline. It also helps to confirm who’s responsible for site cleanup and debris removal between phases, since this is a common point of friction when crews overlap. Weekly check-ins, even brief 15-minute calls or site walk-throughs, catch small issues before they become expensive ones.
Use these touchpoints to confirm material deliveries are on schedule, inspections are booked in advance rather than at the last minute, and any change orders are communicated to every affected trade, not just the one requesting the change. Building in this kind of flexibility and routine communication keeps your project moving smoothly from site prep through final inspection.
- Request proof of licensing and insurance from every trade, including general liability and workers’ comp certificates—verify they haven’t expired mid-project
- Ask for references from recent, similar projects, and actually call at least two to ask about punctuality, cleanup, and change-order honesty
- Build a shared timeline so trades know dependencies, flagging which tasks must finish before the next crew can start (e.g., rough electrical before drywall)
- Schedule regular check-ins during each project phase, whether a quick daily text thread or a weekly on-site walkthrough
- Confirm each trade’s lead time for scheduling, since some specialists book out 2-4 weeks and need advance notice to avoid bottlenecks
- Clarify payment terms and deposit expectations upfront to prevent scheduling conflicts caused by payment disputes later
Conclusion
Mapping out every trade before boxes even open takes patience, but it’s the single best way to avoid delays, budget overruns, and frustrating rework. Start by identifying which specialists your specific project requires, then build a realistic timeline that accounts for permitting, weather, and material lead times. With the right sequence in place, you’ll move from bare ground to finished space with far fewer surprises along the way.