
Moving into a new home marks one of the most significant transitions in life. Whether you are stepping into homeownership for the first time or relocating across town, the process represents a fresh start. However, the sheer volume of logistics required to orchestrate a seamless move can quickly feel overwhelming. From managing timelines and decluttering decades of accumulated belongings to coordinating transportation and setting up essential services, the to-do list seems endless.
Without a structured plan, critical details can easily fall through the cracks, leading to unnecessary stress, unexpected expenses, and moving-day delays. The secret to a smooth, efficient relocation lies in breaking down the process into manageable, chronological phases. By addressing home preparation, waste disposal, storage logistics, and transportation in a systematic way, you transform a chaotic experience into an organized, rewarding project.
This comprehensive master checklist provides a step-by-step roadmap designed to guide you through every stage of your residential transition. By following these actionable strategies, you can ensure your new space is secure, clean, and fully prepared before you unpack your very first box.
Phase 1: Pre-Move Evaluation and Essential Upgrades

Before bringing furniture and personal belongings into your new property, taking time to thoroughly evaluate and restore the home’s infrastructure is vital. Working in an empty house is significantly easier than maneuvering around stacks of boxes and heavy furniture. Addressing structural, mechanical, and aesthetic needs upfront prevents operational headaches after you settle in.
Verify Structural and Mechanical Systems Early
Your priority upon taking possession of the property should be a complete audit of the home’s primary systems. Locate and label the main water shutoff valve, the circuit breaker panel, and the main gas shutoff line so you can react quickly in an emergency. Inspect the HVAC system, replace air filters immediately, and schedule professional servicing if the unit has been sitting idle. Examine doors and windows for drafts, test all outlets using a circuit analyzer, and ensure smoke and carbon monoxide detectors are operational on every level.
Reviewing the detailed findings from your initial home inspection gives you a clear maintenance baseline, allowing you to prioritize urgent repairs such as minor plumbing leaks, roof maintenance, or electrical upgrades before move-in day. Furthermore, inspect all crawlspaces, basements, and attic areas for signs of pest activity or moisture intrusion, arranging for remediation before moving your possessions inside.
Deep Clean External Surfaces and Entryways
First impressions matter, but more importantly, keeping the exterior of your home clean prevents dirt, grime, and environmental contaminants from being tracked indoors during the moving process. Over time, driveways, sidewalks, porches, and exterior siding accumulate moss, algae, and oil stains that can create slick hazards for anyone carrying heavy loads.
Scheduling professional power washing prior to move-in day revitalizes exterior surfaces, cleans away stubborn grime, and restores the property’s curb appeal. Pay special attention to high-traffic zones like front walkways, garage floors, and rear patios. Cleaning these areas in advance ensures that family members and workers aren’t tracking mud and debris onto your newly cleaned interior carpets or hardwood floors on moving day.
Phase 2: Decluttering, Sorting, and Waste Disposal
One of the most common mistakes people make when relocating is packing items they no longer need, want, or use. Moving unused items inflates your transportation costs and wastes valuable space in your new home. A rigorous decluttering campaign simplifies packing and streamlines the entire relocation.
Execute a Room-by-Room Purge Strategy
Begin the sorting process at least four to six weeks before your target move date. Approach your current residence systematically, tackling one room at a time rather than trying to sort the entire home at once. Categorize every item into four distinct groups: Keep, Donate, Sell, and Discard.
- Clothing and Textiles: Donate garments that no longer fit or haven’t been worn in over a year.
- Electronics and Appliances: Recycle outdated chargers, non-working electronics, and duplicate kitchen appliances.
- Paper and Documents: Shred unnecessary financial statements, old receipts, and expired warranties while digitizing essential records.
- Furniture and Decor: Evaluate whether larger items will fit the scale and layout of your new floor plan; if not, list them for sale early.
Arrange Large-Scale Junk Removal for Renovation Debris
Decluttering an entire household inevitably generates a substantial volume of waste, often exceeding what standard weekly curbside collection can handle. If you are conducting pre-move deep cleaning, clearing out an attic or basement, or taking on minor interior demolition—such as ripping up old carpet or removing worn-out cabinetry—you need a dedicated waste disposal solution.
Partnering with a reliable dumpster rental company gives you a centralized roll-off container on site, allowing you to clear out bulky items and debris safely and continuously without cluttering your driveway or yard. Additionally, adhering to municipal waste management guidelines ensures that hazardous household materials, such as old paints, automotive fluids, batteries, and electronics, are routed to proper recycling facilities rather than landfilled, keeping your cleanup compliant with local environmental laws.
Phase 3: Transitioning Logistics and Temporary Off-Site Storage

Moving schedules rarely align perfectly. Whether you are navigating gap periods between real estate closings, waiting for construction upgrades to finish, or staging a home for sale, flexible spatial solutions are often necessary to keep your move on schedule.
Bridge the Timeline Gap Between Leases and Closing Dates
Transitioning between residences frequently involves managing overlapping timelines or brief periods of temporary displacement. Understanding the unique constraints of your specific housing type allows you to build realistic buffer periods into your moving schedule.
For instance, ending a lease on an apartment rental often requires strict adherence to move-out dates, professional carpet cleaning, and rigorous inspection standards to secure your full security deposit. On the other hand, purchasing newly manufactured homes for sale may involve site preparation timelines, utility hookup scheduling, or land-use permits that dictate precisely when the property is ready for occupancy. Factoring these property-specific variables into your timeline early helps you avoid double-paying rent or mortgage installments while ensuring you have a secure place for your possessions if move-in day gets delayed.
Leverage Short-Term and Long-Term Off-Site Holding Units
When your move-in date does not line up seamlessly with your move-out date, off-site storage options provide an essential safety net. Staging packed boxes and non-essential furniture off-site also keeps your new home clear during painting, flooring installations, or electrical work.
- Climate-Controlled Units: Essential for protecting sensitive items—such as wooden furniture, artwork, electronics, leather goods, and delicate fabrics—from extreme temperatures and humidity.
- Drive-Up Units: Ideal for quick loading and unloading of non-sensitive household goods, outdoor furniture, and durable tools.
- Portable Storage Containers: Delivered directly to your driveway, allowing you to pack at your own pace before being transported to your new address or a secure facility.
Utilizing short-term storage services provides a safe bridge when move-in dates do not perfectly align, keeping your possessions secure during transitional periods. For larger home transitions, multi-stage renovations, or commercial relocations, commercial warehouse storage offers high-capacity security and flexible space for your belongings until your new home is completely ready.
Phase 4: Selecting and Coordinating Transportation Services
The physical transport of your belongings is the backbone of moving day. Selecting the right professionals and matching their capabilities to your specific inventory ensures your items arrive safely and on time.
Research and Book Reliable General Haulers
Securing high-quality transportation requires early action, particularly if you are moving during peak seasonal months between May and September. Start gathering estimates at least six weeks in advance to compare pricing structures, included services, and liability coverage options.
Request detailed, itemized estimates from multiple providers, opting for binding quotes whenever possible to prevent unexpected price increases on moving day. Verify that every company carries active licensing with relevant federal or state transportation authorities, and review their insurance policies regarding valuation coverage for lost or damaged goods. Vetting licensed moving companies early guarantees you secure experienced labor, proper equipment, and reliable transport dates tailored to your schedule.
Contract Specialized Transport for Heavy and High-Value Items
Standard household moving crews excel at handling furniture, boxed goods, and appliances, but certain specialized items demand expert handling, custom rigging, and advanced equipment. Oversized, extremely heavy, or high-security items—such as gun vaults, commercial-grade security safes, ironwork, and heavy musical instruments—can easily exceed the safe weight limits of standard equipment.
Attempting to move ultra-heavy items without proper gear puts crew members at risk of injury and often results in costly structural damage to doorways, staircases, and hardwood flooring. Hiring specialized local safe movers protects both your high-value security vaults and your property’s interior surfaces. These specialists arrive equipped with heavy-duty stair-crawlers, hydraulic lifts, reinforced dollies, and floor-armoring plates designed to distribute extreme weight safely without scarring your floors.
Phase 5: Moving Day Execution and Unpacking Priorities
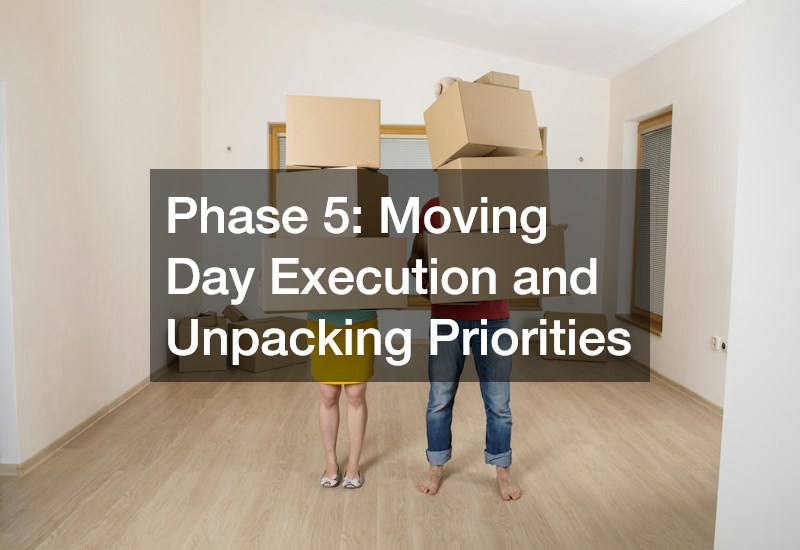
When moving day finally arrives, chaos can quickly ensue without clear management protocols. Protecting your new home’s surfaces and following an organized unpacking order will save you hours of frustration during your first week.
Protect High-Traffic Interior Surfaces
Before the first box crosses the threshold of your new home, lay down protective materials across all high-traffic areas. Moving crews and family members will make hundreds of trips in and out, carrying heavy loads that can scratch flooring, scuff walls, and tear carpet.
- Floor Coverings: Lay down heavy masonite boards or durable neoprene floor runners along main hallways, entryways, and wood flooring paths.
- Staircase Protection: Cover wooden stairs with non-slip stair runners and wrap banisters in padded moving blankets or bubble wrap.
- Door Jamb Guards: Clip padded jamb protectors onto main entry doors to prevent gouging door frames when carrying wide furniture pieces.
- Essentials Box: Keep a dedicated “First Night Kit” easily accessible. This box should contain toilet paper, paper towels, hand soap, basic tools, phone chargers, trash bags, medications, basic toiletries, and a change of clothes for each family member.
Systematically Unpack Room by Room
Resist the urge to open random boxes across different rooms. Unpacking without a strategy creates widespread clutter and makes it difficult to relax at the end of an exhausting day. Instead, focus on establishing functional high-priority spaces first.
Begin with the primary bedrooms. Setting up beds and laying out clean linens early in the day guarantees that every family member has a comfortable place to sleep when fatigue sets in. Next, turn your attention to the main bathrooms, setting up shower curtains, towels, and basic hygiene products.
Once sleeping and personal care areas are functional, prioritize the kitchen. Unpack essential cookware, plates, utensils, and basic appliances so you can prepare simple meals rather than relying entirely on takeout. Save low-priority areas—such as guest bedrooms, basements, decorative living spaces, and seasonal garage storage—for the days and weeks that follow.
Phase 6: Post-Move Administrative Tasks and Home Security
Once the physical move is complete and the major boxes are unpacked, your focus shifts toward securing the perimeter and finalizing essential administrative updates to settle into your new community.
Update Security and Access Control
Taking immediate steps to secure your property provides peace of mind from day one. You never know how many spare keys were distributed to contractors, neighbors, or previous tenants by prior occupants.
Complete Address Changes and Utility Transfers
Finalize your administrative transition promptly to prevent service disruptions or missed financial communications. Ensure all official records reflect your new physical address.
Submit an official change-of-address form with the postal service to initiate mail forwarding. Update your primary address with financial institutions, credit card issuers, insurance providers, employers, and government agencies, including updating your driver’s license and vehicle registration within state-mandated timelines. Contact utility providers at both your previous and new addresses to confirm final meter readings for water, gas, and electricity, ensuring accounts are officially closed at the old residence and properly established under your name at the new home.
Using This Guide for Moves

Transitioning into a new home is a journey built on hundreds of small decisions and logistical details. By tackling these tasks through a structured, phased approach, you eliminate the guesswork and drastically reduce the stress associated with moving. From preparing your property’s exterior and clearing out unwanted waste to securing temporary storage and booking trusted transportation partners, early preparation transforms an intimidating process into a series of clear, manageable steps.