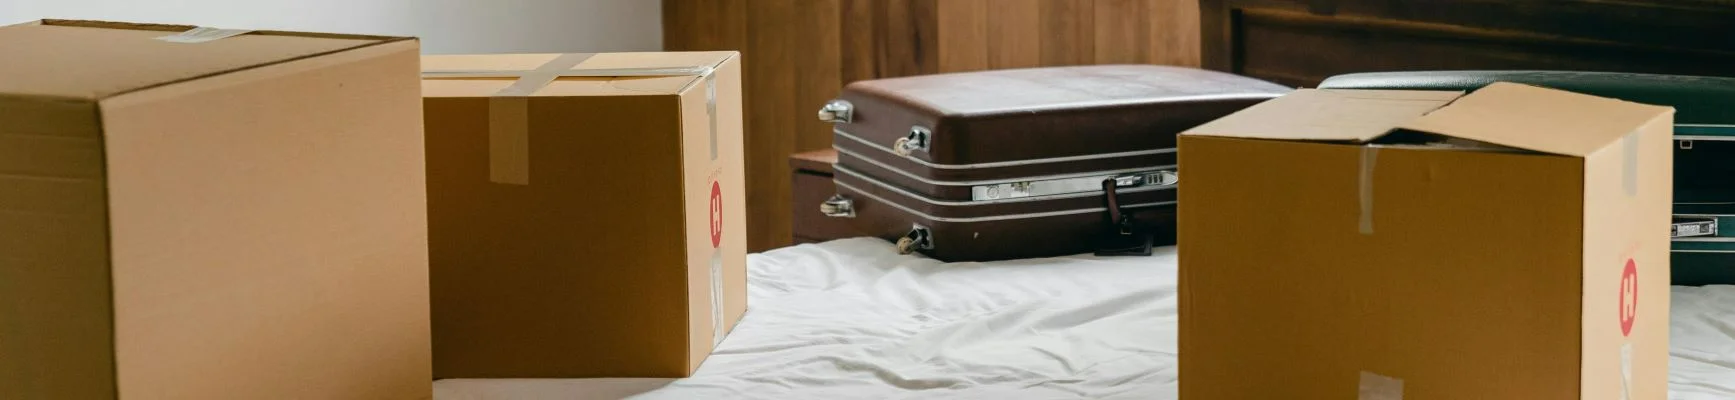

There is a universal feeling of dread that almost always accompanies the sight of flattened cardboard boxes and endless rolls of packing tape. Moving is widely recognized as one of the most stressful life events a person can endure, rivaling major life changes and career shifts in terms of the anxiety it produces. But the truth is, the physical act of transporting items from point A to point B is rarely the actual source of that anxiety. Instead, the overwhelming nature of moving stems from a lack of a clear timeline and the exhausting attempt to pack years of accumulated clutter rather than taking the time to purge it first.
When you look around your home, you aren’t just seeing objects; you are seeing memories, investments, and decisions that need to be made. Trying to make hundreds of micro-decisions while under a strict deadline is a recipe for burnout. The good news is that transitioning to a new home does not have to be a chaotic, tear-filled ordeal. By implementing a systematic, step-by-step approach, you can drastically minimize the physical and mental toll of moving.
This guide is designed to transform the way you approach your next move. By focusing on meticulous timeline creation, aggressive decluttering, strategic packing, and mastering the logistics of moving day, you can regain control over the process. You are about to learn how to break an enormous project into manageable daily tasks, ensuring that by the time you hand over the keys, you are focused on the excitement of your new home rather than the exhaustion of leaving the old one.

Map Out Your Eight-Week Timeline and Assemble Your Team
The most common mistake people make when relocating is underestimating the time required to properly prepare. Waiting until the last two weeks to begin your preparations guarantees late nights, broken items, and skyrocketing stress levels. To avoid this, you must work backward from your official move-out date to set weekly micro-goals. This timeline approach leverages the psychology of breaking a massive, seemingly impossible project into smaller, highly digestible tasks.
Creating a master calendar is your first crucial step. A standard eight-week timeline allows you to handle the logistics at a comfortable pace. During the eighth week, your focus should strictly be on inventory and budgeting. Walk through your home with a clipboard and write down exactly what furniture is coming with you and what needs to be replaced. Week seven should be dedicated to gathering supplies—boxes, tape, bubble wrap, and markers. By week six, you begin the decluttering phase, and by week four, you start packing the non-essential items you will not need for the next month. This slow, methodical build-up prevents the dreaded final-week panic.
-
Week 8-7: Logistics and Supplies. Finalize your budget, gather estimates, create your master inventory, and begin sourcing high-quality packing materials. Do not skimp on heavy-duty tape or sturdy boxes.
-
Week 6-5: The Purge. Dedicate these weeks entirely to sorting through your belongings. Do not pack a single box until you have decided what is actually worth keeping.
-
Week 4-3: Packing Non-Essentials. Books, out-of-season clothing, decorative items, and fine china should be boxed up now.
-
Week 2-1: The Essentials and Final Details. Pack your daily kitchenware, finalize utility transfers, confirm times with helpers, and pack your personal travel bags.
Alongside your timeline, securing your transportation and lifting support early is paramount. You need to book your help at least four to six weeks in advance, especially if you are moving during the peak summer season, which typically runs from May through September. Waiting too long limits your options and often forces you to pay premium last-minute rates. Take the time to read reviews, check credentials, and interview reputable local movers to ensure your fragile items and heavy furniture are in capable, professional hands. Ask them detailed questions about their insurance policies, their claims process for damaged goods, and how they handle delays.
Furthermore, if your budget allows for it, investing in comprehensive moving services can completely eliminate the physical burden of the transition. Many companies offer white-glove options where teams arrive, carefully wrap your belongings, box them up, and then unpack them at your destination. By outsourcing the heavy lifting and the meticulous wrapping, you free up your mental bandwidth to focus on the myriad of other tasks that require your attention, such as transferring utilities, changing your address, and managing your family’s emotional transition.

The Brutal But Necessary Purge Strategy
You cannot organize clutter, and you certainly should not pay to transport it. The single most impactful thing you can do to reduce moving stress is to relentlessly purge your belongings before a single box is packed. To tackle high-density zones efficiently, utilize the highly effective four-box method. Bring four large, clearly labeled bins into the room you are working on: Keep, Donate, Sell, and Trash.
As you touch every single item in the room, force yourself to place it into one of these four categories immediately. Do not create a “maybe” pile. A “maybe” pile is simply a delayed decision that you will have to deal with when you are more exhausted closer to moving day. When deciding what to keep, ask yourself if the item is useful, beautiful, or deeply sentimental. If it does not fit those criteria, let it go. Be mindful of the sunk cost fallacy—the idea that you must keep something because you paid good money for it. If it no longer serves you, it is only costing you space and peace of mind.
-
Keep: These items are actively used in your daily life or hold profound, irreplaceable sentimental value. They will be packed carefully.
-
Donate: Items that are in good condition but no longer fit your lifestyle. Dropping these off at a local charity provides a clean break and a helpful tax deduction.
-
Sell: High-value items that are worth the time it takes to list them online or host a yard sale. Set a strict deadline; if they don’t sell by a certain date, they get donated.
-
Trash/Recycle: Broken, stained, or expired items that cannot be salvaged.
It is always best to start this process in the bedroom. Going through your wardrobe sets the tone for the rest of the house. Implementing strict closet organization before a move prevents you from paying an hourly rate to transport clothes you haven’t worn in years. Try on items you are unsure about, and if they do not fit your current body or your current lifestyle, place them in the donate box.
However, there are times when a standard decluttering session is simply not enough. This is especially true if you are moving out of a family home you have occupied for thirty years, or if you are managing the transition of an elderly parent. Recognizing when the volume of belongings exceeds your physical capacity is crucial. For massive properties, hoarder situations, or inherited homes filled with decades of accumulation, hiring an estate cleanout service can save you weeks of agonizing physical labor and emotional exhaustion. These professionals are trained to come in, assess the volume, rapidly sort valuables from debris, and clear the property efficiently, allowing you to focus on the future rather than getting bogged down in the overwhelming past.

Clear Out Bulky Junk and Unwanted Furniture Fast
Once you have sorted through the smaller items in your closets, cabinets, and drawers, you will inevitably be left with the larger, bulkier obstacles. Garages, basements, and attics are notorious for harboring broken items, old lumber, rusted tools, and obsolete technology. Getting rid of these items piecemeal by taking weekend trips in the back of your car to the local dump is an incredible waste of your valuable time and energy.
Instead, you need to implement heavy-duty disposal solutions. Planning a dedicated clean-out weekend is the most efficient way to handle this phase. Gather your family members or a few willing friends, order pizza, and focus exclusively on clearing the non-salvageable junk from your property’s storage areas.
-
Group similar materials: Keep metals, woods, and general refuse separated if required by your local waste management guidelines.
-
Handle hazardous waste properly: Paint, motor oil, fertilizers, and old cleaning chemicals cannot go into standard trash. Look up your county’s hazardous waste drop-off days and box these items up securely.
-
Recycle e-waste: Old televisions, broken computers, and tangles of mystery cords should be taken to an electronics recycling center.
To make this weekend highly effective, scheduling a dumpster rental to be dropped off in your driveway allows you to toss out broken furniture, old lumber, and unsalvageable junk in one fell swoop. Having a large receptacle on-site removes the friction of figuring out how to transport the trash. You simply walk it out the door and toss it in. When the weekend is over, the company hauls it away, instantly freeing up massive amounts of space in your home and making the rest of the packing process feel infinitely more manageable.
You must also consider how to responsibly discard large, soft goods that charities will not take. While thrift stores are usually happy to accept gently used dining tables and dressers, they have very strict hygiene rules regarding other items. Beds, for instance, are rarely accepted due to the risk of bedbugs and sanitary regulations. Dragging a heavy, floppy bed to the curb is exhausting, and in many municipalities, the garbage collectors will refuse to take it unless it is specially wrapped, or you have paid a bulk pickup fee.
To bypass this headache, look into specialized mattress removal services. These companies specialize in coming directly into your home, hauling the heavy item out without damaging your walls or staircases, and ensuring it is disposed of properly or broken down for recycling. Handling these large, problematic items early in your timeline clears out floor space and provides a massive psychological boost as you prepare for the final packing stages.

Create a Staging Area for Phased Packing
Living in a home that is slowly being overtaken by cardboard boxes is incredibly stressful. Tripping over towers of packed winter coats in the hallway or losing your dining room table to a sea of bubble wrap disrupts your daily life and adds a constant, visual reminder of your to-do list. To maintain your sanity during a move, you must create a staging area for phased packing.
Staging a house means moving packed boxes out of the active living spaces so the house doesn’t feel chaotic during the final weeks. If you have a spare bedroom, a dry garage, or a formal dining room you rarely use, designate this as your official staging zone. As soon as a box is taped and labeled, it gets moved to the staging area. This keeps your primary living spaces—like the kitchen, living room, and master bedroom—feeling normal and functional for as long as possible.
-
Stack smartly: Always place the heaviest boxes on the bottom to create a stable base.
-
Create aisles: Leave walkways between your stacks of boxes so you can easily access items in the back if an emergency arises and you need to open something.
-
Protect from the elements: If your staging area is a garage or basement, place wooden pallets or thick plastic sheeting on the floor before stacking boxes to protect against unexpected moisture.
If your home lacks a suitable indoor staging area, you should utilize on-site containers for room-by-room clearing. Renting portable storage that sits directly on your property is a game-changer for phased packing. These weatherproof containers can be dropped in your driveway a month before you move. Every weekend, as you finish packing a room, you can walk the boxes directly into the unit. This allows you to clear the clutter at your own pace without sacrificing the comfort of your living spaces.
Furthermore, you can optimize these driveway units by loading your heavy, non-essential furniture first. Getting the guest room bed, the oversized bookshelves, and the heavy patio furniture out of the house weeks early makes the final days of the move incredibly easy. Utilizing mobile storage pods to secure these heavy items drastically reduces the last-minute rush and the physical toll on moving day. Once the container is full, the provider simply picks it up and delivers it to your new home, effectively cutting the chaos of moving day in half.
Pack Strategically to Protect and Unpack Easily
The way you pack your boxes dictates how stressful your first week in the new home will be. Shoving random items into a box and writing “Misc” on the side is a surefire way to lose your belongings and your temper. Strategic packing requires a system that protects your valuables in transit and makes unpacking a logical, streamlined process.
First, invest in the right materials. Using free boxes from the back of a grocery store might save you a few dollars, but they are often compromised by moisture, pests, or structural weakness. Buy uniform, corrugated boxes. Standardized sizes stack perfectly in the back of a truck, preventing dangerous shifting during transit. Use specialized dish-pack boxes with double-thick walls for your kitchenware, and always pack plates vertically, like records, rather than stacking them flat, to prevent the ones on the bottom from cracking under the pressure.
-
Use the right tape: Standard masking tape or duct tape will unpeel in extreme heat or cold. Use proper acrylic packing tape.
-
Protect electronics: Take a photograph of the back of your television and computer to remember where the wires go. Pack cords in ziplock bags and tape them to the corresponding device.
-
Fill the gaps: A half-empty box will crush under the weight of others. Fill empty spaces with crumpled packing paper, towels, or old t-shirts to keep the box solid.
To master the unpacking process, you must color-code and inventory every box before it leaves the room. Purchase a multi-pack of colored duct tape and assign a color to every room in your new house. For example, blue tape means the master bedroom, red tape means the kitchen, and green tape means the living room. Place a strip of the corresponding tape on the top and two sides of the box. This way, whoever is carrying the box into the new house instantly knows exactly where it goes without having to stop and read your handwriting.
Additionally, number your boxes and create a master inventory spreadsheet. Labeling a box “Kitchen 1 of 15” and noting its contents on your spreadsheet (e.g., “Box 1: Blender, baking sheets, measuring cups”) ensures that if a box goes missing, you know exactly what was inside it. It also prevents you from frantically opening fifteen boxes just to find the coffee maker on your first morning.
You also need a strategy for items that you want to keep but do not need immediately. Transitioning to a new home often means you are dealing with a lack of organization systems in the first few weeks. Bringing your massive artificial holiday tree, your bulky winter snowboards, and boxes of childhood keepsakes directly into the new house will crowd your space while you are desperately trying to set up your primary living areas. Placing these off-season and non-essential items into self storage facilities temporarily gives you the breathing room you need to unpack at a reasonable pace. You can slowly bring these items into the home over the next few months as you establish where everything should permanently live.
Master the Final Forty-Eight Hours and Moving Day
No matter how well you have planned, the final forty-eight hours will be chaotic. Your house is mostly empty, your regular routines are shattered, and exhaustion is likely setting in. The key to surviving this final sprint is to focus heavily on personal care and extreme organization of your immediate essentials.
The most critical step in this phase is packing an “open-first” survival kit for your first night and morning in the new home. After twelve hours of physical labor, the last thing you want to do is dig through heavily taped boxes looking for a toothbrush or a bed sheet. This survival kit should be packed in a clear plastic bin so it stands out from the sea of cardboard, and it should travel in your personal vehicle, not in the back of the transport truck.
-
Bedding: Clean sheets, pillows, and a blanket for every bed that needs to be slept in that night.
-
Toiletries: Toilet paper, toothbrushes, toothpaste, soap, shampoo, and a shower curtain (you cannot shower in the new house if water is spraying everywhere).
-
Tools: A box cutter, a multi-tool screwdriver, a hammer, and a flashlight.
-
Sustenance: Bottled water, paper plates, plastic utensils, snacks, and most importantly, your coffee maker with grounds and mugs for the next morning.
-
Medical and Admin: Daily medications, pain relievers, pet food, and a folder containing all your important documents (passports, birth certificates, closing papers, and contracts).
During moving day itself, keep pets and small children out of the fray if possible. Having a trusted friend or family member watch them off-site prevents injuries and reduces ambient stress. If they must be present, clear a designated room for them to stay in with snacks and entertainment.
As the truck is being loaded, position yourself near the front door to act as the traffic director. You have labeled your boxes brilliantly with colors, so simply remind the crew of the system. Stay out of their way, but remain available for rapid-fire questions. Make sure you have cash on hand to tip the workers, and consider providing cold bottled water and snacks—a well-hydrated, appreciated crew will handle your belongings with much greater care.
Finally, before you lock the door for the last time, you must do a thorough, final walkthrough. It is astonishing how easily things blend into the background when a house is emptied. Open every single cabinet and drawer in the kitchen and bathrooms. Check the highest shelves in all the bedroom closets. Look behind the washer and dryer, and walk through the backyard, checking the outdoor sheds or patio corners. Do this final sweep alongside the foreman of your chosen local moving company to guarantee that absolutely nothing is left behind on the truck or in the hidden corners of the house before you sign the final paperwork and hand over the keys.
Conclusion
Transitioning your life from one physical space to another will never be a completely effortless endeavor, but the difference between a nightmare scenario and a smooth transition lies entirely in your preparation. By acknowledging the scope of the project early and refusing to procrastinate, you take control of the narrative. Relentlessly decluttering ensures that you step into your new space unburdened by the unnecessary weight of the past. Strategic staging and meticulous labeling turn the overwhelming task of unpacking into a straightforward, predictable puzzle.
It is vital to remember that the temporary chaos, the sore muscles, and the endless lists are all serving a greater purpose. Waking up on your first morning in a fully organized, clutter-free new home, surrounded only by the things you truly love and need, is the ultimate reward. Give yourself grace during the difficult moments, rely on your structured timeline, and keep your eyes focused on the fresh start ahead.
Every move is a learning experience, and implementing these strategies will ensure your next transition is your most successful one yet. What has been the single biggest challenge you’ve faced during a past move, or what room are you dreading packing the most? Share your thoughts below, and be sure to save this page or print out the eight-week timeline to keep yourself on track as you begin your journey home.